Profile time filtering controls the start and finish time of a report, with a range of options to automatically set common time filtering requirements. Selected periods can also be excluded based on time of day, and day of the week. All adjustments can be made to any 15-minute boundary.
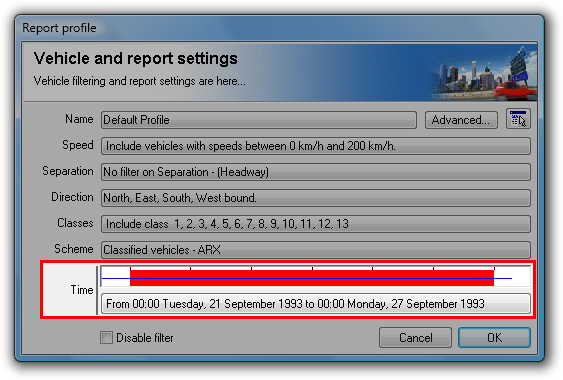
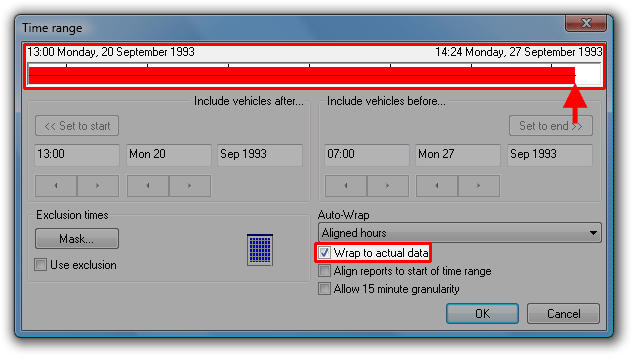
The time filter options are accessed by clicking the button showing the currently selected time range. The chart above the button represents the available time range for the tagged datasets. The blue line in the centre represents the range of actual data, from the start time to the last detected sensor hit. The red bar represents the selected time range.
The default behaviour of a Local Profile is to select the entire time range. Time filtering is primarily used to avoid partial time bins at the start and finish of reports, and for including integral numbers of complete hours or days for statistical analysis.
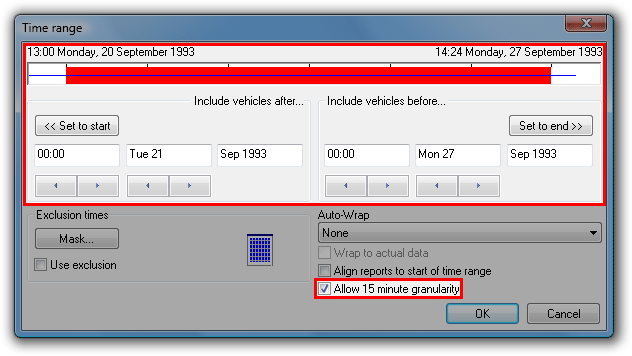
The time range of a report can be manually set using the controls in the Include vehicles after (start) and Include vehicles before (finish) blocks. The buttons, or spin control under the time adjust the time in hourly steps, or 15 minute steps if the Allow 15 minute granularity option is checked. The date spin control steps in days.
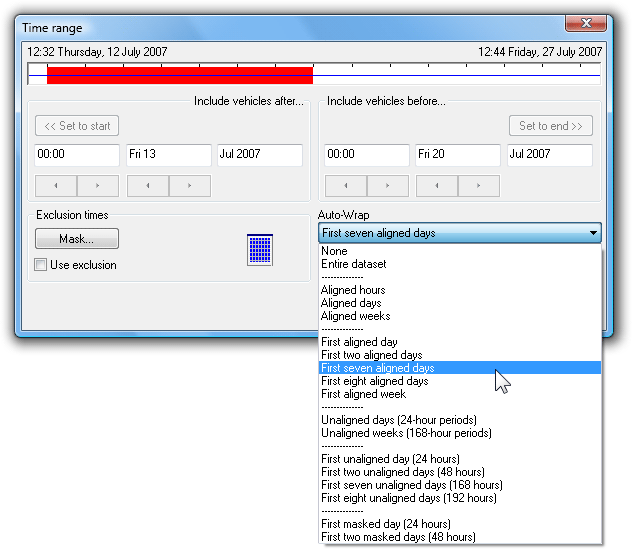
The Auto-wrap options automatically adjust the time range to a selection of common filtering requirements. If the selected wrap type cannot be applied to the available data, the time range chart will flash.
Aligned Auto-wrap options adjust the time filter to the maximum number of the selected time increment (hour, day or week), aligned to the selected time increment. Put simply:
- Aligned Hours wraps to complete hours.
- Aligned Days wraps to complete days, starting at midnight.
- Aligned Weeks wraps to complete weeks, starting midnight Monday (or Saturday for alternate weekends).
Unaligned Auto-wrap options adjust the time filter to the maximum number of the selected time increment (hour, day or week), but only aligned to hours. For example, First two unaligned days (48 hours) will select the first two days of data, aligned to the first complete hour.
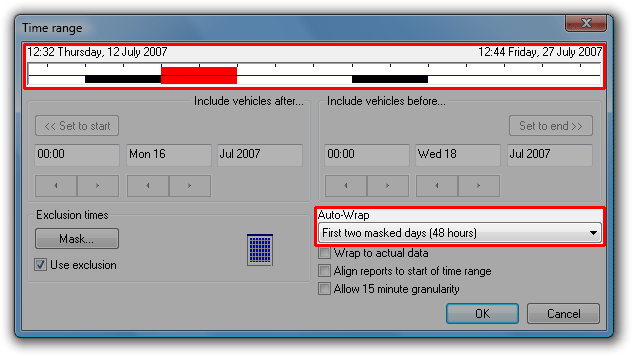
Masked Auto-wrap options select the maximum number of contiguous time increments not masked by the Time Mask. For example, the first 48 hours of weekday data can be selected by masking weekends with the Time Mask, then selecting First two masked days (48 hours).
The Wrap to actual data option aligns the Auto-wrap options to the last hour, day or week containing sensor hits, as represented by the blue line. The time of the last sensor hit may differ from the dataset finish time if the RSU was removed from the field before unloading.
The Time Mask is used to exclude particular times of the week (with 15 minute resolution), or selected dates from the time range of the tagged datasets. Some common uses for the Time Mask:
- Excluding weekends.
- Targeting "school hours" for variable speed limits.
- Excluding holidays.
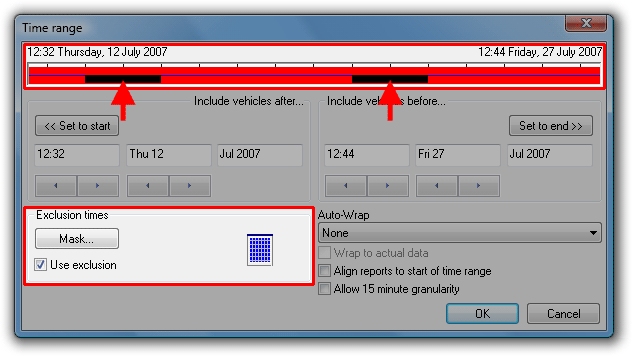
The Time Mask settings are accessed by clicking the Mask button. Note that the Use exclusion option must be checked for the Time Mask to take effect. The masked times will be represented by black regions in the time range chart.
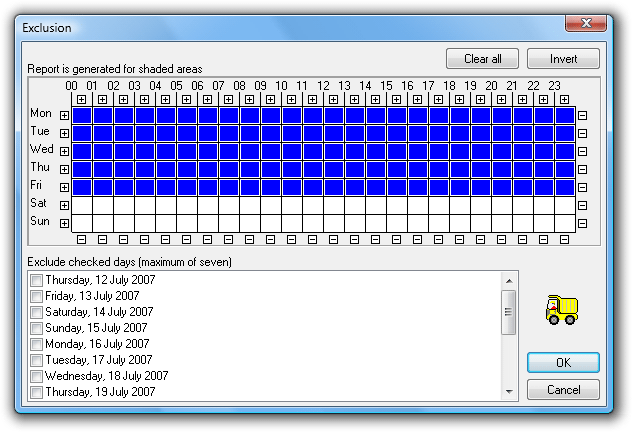
The Time Mask uses a grid representing a week divided into hours. Shaded hours will be included in the report, and white hours excluded. Each hour can be toggled by clicking on it, or rapidly toggled by clicking and dragging. Entire rows and columns can be toggled using the + and - buttons.
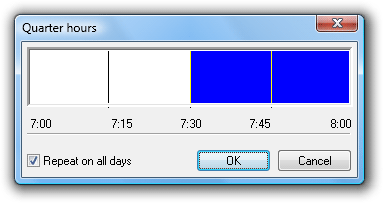
Right-clicking on any hour displays a dialog box with 15 minute resolution. The Repeat on all days option will copy the selected hour across the entire week.
![[Note]](MTEHelp/images/note.png)
|
Note |
|---|---|
| For reports where data is binned into hours, excluding part of an hour in the Time Mask will exclude the entire hour. | |
Specific dates can be excluded from a report by checking them in the Exclude checked days list at the bottom, up to a maximum of five. Use this feature for excluding dates that may adversely affect statistics, such as holidays.
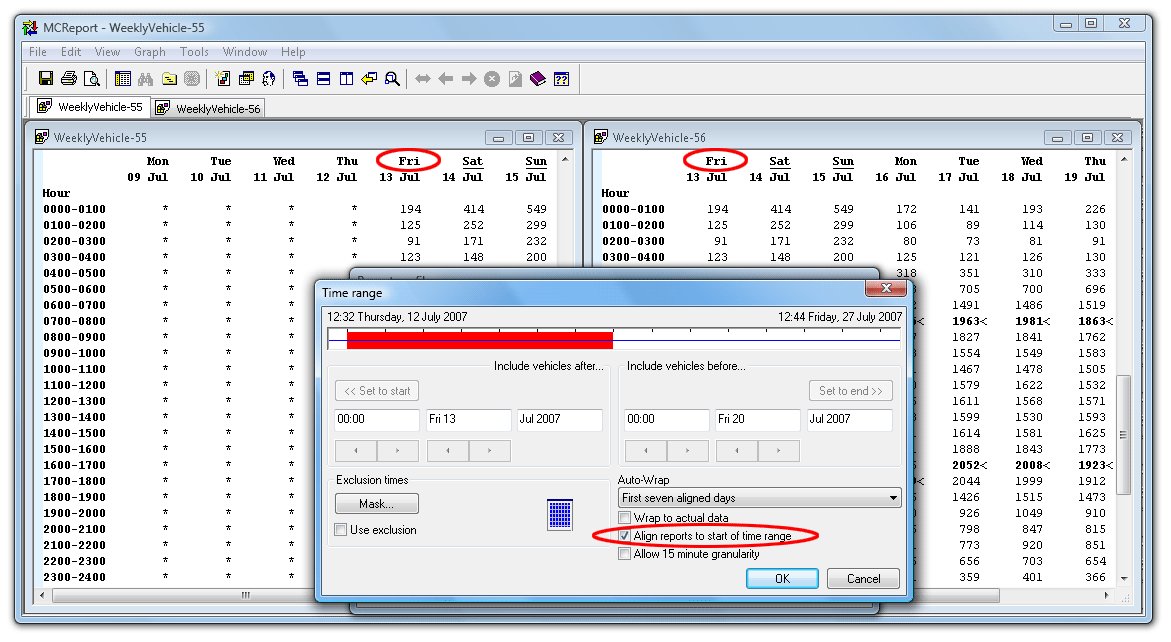
The Align reports to start of time range option changes the beginning of reports to the first time step (option checked), or the natural division (default unchecked). Take for example the Weekly Vehicle or Daily Classes reports. The natural division of these reports is weeks, starting at Monday (or Saturday for alternate weekends). Checking this option will start the report at the first day in the selected time range. This is extremely useful for printing a complete week of data on a single page.

