Data Unload
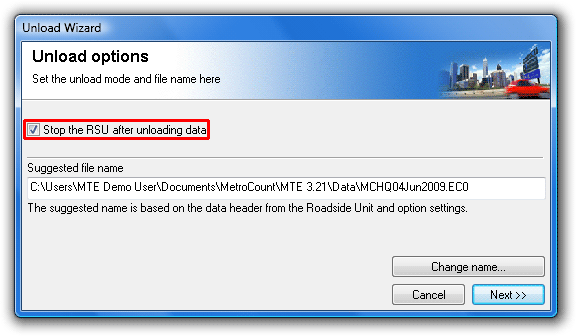
The Unload process transfers a RSU's header and data to a proprietary-format binary data file known as a Dataset. An Unload can be performed at any time, without interrupting logging. At the end of a survey, the RSU should be stopped as part of the Unload process.
![[Note]](MTEHelp/images/note.png)
|
Note |
|---|---|
| Unloading data from a RSU does not erase the data from memory. All data remains until the next setup is performed, so data can be unloaded again if necessary, until the next setup. | |
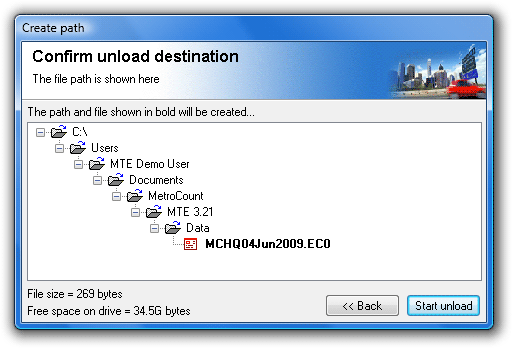
MCSetup uses the Base folder for unloaded data location specified in the Preferences to store unloaded data. MCSetup also supports automatic creation of a folder structure, based on a combination of a RSU's Site and Attribute, and the current year and month. Refer to the section MCSetup Configuration for details.
When unloading data from a RSU, the dataset's filename will be automatically generated. This is based on the RSU's Site parameter, and the current date.
The dataset's filename need only be unique. If a file by the same name already exists, an overwrite warning will be displayed. There is no need to make the dataset filename descriptive. When browsing for datasets with MCReport, files will always be listed by their key header details.
|
|
Note |
|---|---|
| The three character file extension is extremely important. Datasets are created with a file extension of .ecX where X is the lane number. MCReport uses this file extension to recognise MetroCount datasets. Do not change this file extension. | |
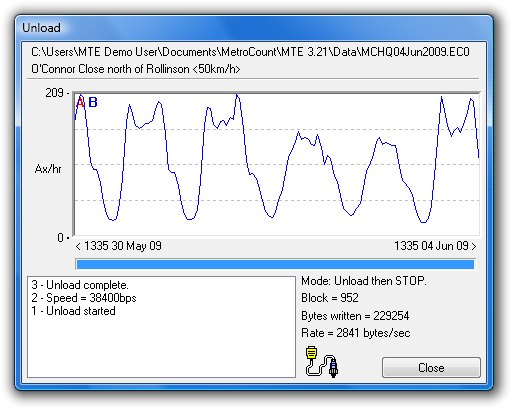
If possible, unload a RSU's data before removing from the site. This provides an opportunity to view basic data quality, and collect further data in the unlikely event of sensor failure. An Unload should complete in under 10 minutes, dependent on capacity.
![[Procedure]](MTEHelp/images/procedure.png)
|
To unload data from a RSU |
|---|---|
|
|